
Night Heron User Guide
1. Getting Started
Welcome to the Night Heron Alert System! This guide will walk you through setting up sensors and configuring alerts to monitor environmental data effectively.
Night Heron is designed to track sensor data in real-time from sources like Monitor My Watershed and Purple Air and notify you via email or text message when measurements fall outside your defined safe zones.
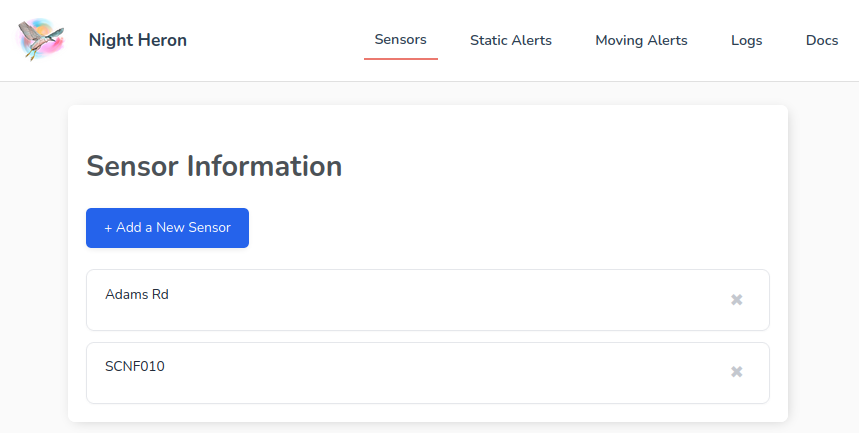
2. Adding Sensors
Before you can create alerts, you need to add the sensor sites you want to monitor.
2.1 Prerequisites
Ensure your sensor data is publicly available on a platform that Night Heron can access. For Monitor My Watershed, you'll need the Site Code.

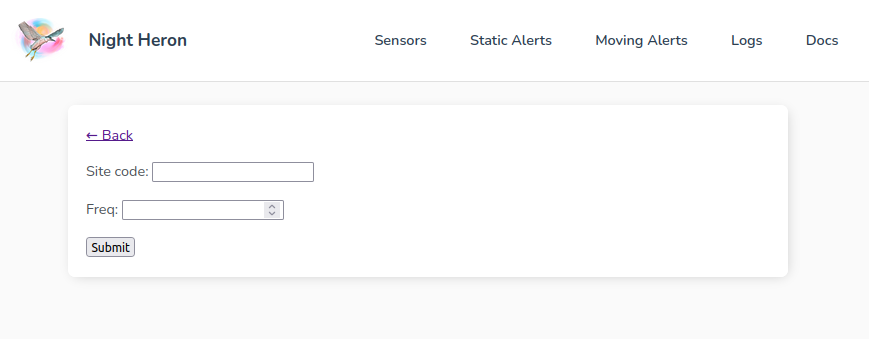
2.2 Sensor Form Details
Navigate to the "Sensors" page and click "Add New Sensor". You'll need to provide:
- Site Code: The unique identifier for your sensor site (e.g.,
North Fork #0). - Update Frequency (minutes): How often the sensor typically reports new data. This helps optimize data fetching.
Once saved, Night Heron will attempt to fetch the latest data for this sensor.
3. Creating Alerts
Alerts define the conditions under which you will be notified. Night Heron supports two main types of alerts: Static Alerts and Moving-Average Alerts.

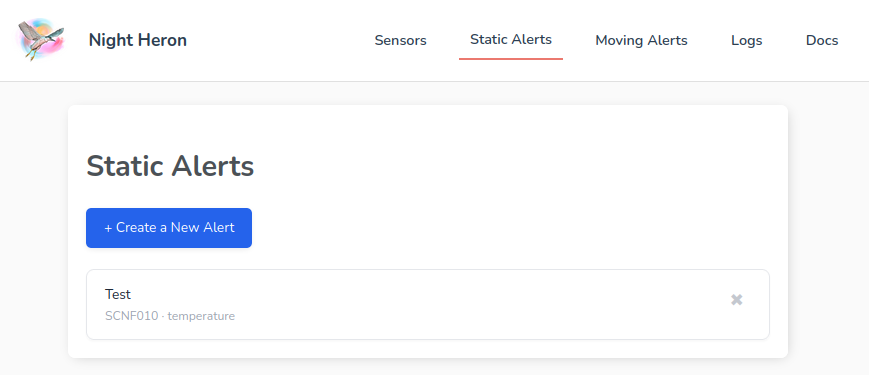
3.1 Static Alerts
Static alerts trigger when a sensor reading crosses a fixed threshold (an absolute high or low value).
Example: Notify if water temperature exceeds 20°C or drops below 2°C.
| Field | Description | Example |
|---|---|---|
| Title | Name of the rule for identification | Example 1 Temperature |
| Zipcode | Location used for fetching local weather data | 94704 |
| Site code | Unique identifier from Monitor My Watershed | North Fork #0 |
| Sensor type | The type of measurement (e.g., temperature, depth) | Temperature (Celsius) |
| Upperbound | Value above which an alert is triggered | 20.0 |
| Lowerbound | Value below which an alert is triggered | 2.0 |
| Post rain pause | Minimum hours after last rainfall before reactivating alerts | 0 |
| Pre rain pause | Minimum hours before expected rainfall to suppress alerts | 0 |
| Minutes between consecutive alerts | Cooldown period before firing another alert | 15 |
| Email list | Comma-separated list of emails to notify | example@gmail.com |
| Text list | Comma-separated phone numbers for SMS alerts | [1-111-1111] |

3.2 Moving-Average Alerts
Moving-average alerts are more dynamic. They track a simple moving average (SMA) or exponential moving average (EMA) of sensor readings over a defined period. An alert triggers if the current reading deviates by a certain percentage from this moving average.
This is useful for detecting sudden changes relative to recent trends, rather than absolute values.
Example: Notify if turbidity increases by more than 50% above the 24-hour moving average.
| Field | Description | Example |
|---|---|---|
| Title | Name of the rule for identification | test |
| City | Location or ZIP code for weather lookups | 94704 |
| Site code | Sensor site to monitor | North Fork #0 |
| Stat choice | Which averaging method to use for the alert (SMA or EMA) | Simple Moving Average |
| Average time (hrs) | Rolling window in hours used to compute average | 24 |
| Sensor type | The type of sensor being monitored | Temperature (Celsius) |
| Upperbound (%) | % deviation above the moving average to trigger alert | 5 |
| Lowerbound (%) | % deviation below the moving average to trigger alert | 5 |
| Post rain pause | Minimum hours after rain before alerts can fire again | 0 |
| Pre rain pause | Minimum hours before forecasted rain to allow alerts | 0 |
| Time between alerts | Cooldown time before the same alert can fire again (minutes) | 180 |
| Email list | Comma-separated list of emails for notification | example@gmail.com |
| Text list | Comma-separated phone numbers to send SMS alerts | 1-111-1111 |


4. Notifications
When an alert condition is met, Night Heron will send notifications to the configured email addresses and/or phone numbers (via SMS).
Each alert configuration allows you to specify:
- Email List: Comma-separated email addresses.
- Text List: Comma-separated phone numbers (1-111-1111).
- Cooldown Period: Minimum time between consecutive alerts for the same rule to prevent notification fatigue.
5. Reviewing Alert Events
The "Alert Events" page provides a historical log of all alert processing attempts and their outcomes. This is crucial for understanding if your alerts are triggering as expected, if notifications are being sent successfully, and for diagnosing any issues.
5.1 Accessing the Page
You can navigate to this page using the "Logs" link in the main navigation bar.
5.2 Understanding the Alert Events Table
The table on this page displays the following information for each event:
- Time: The date and time when the alert condition was checked or the event was processed.
- Site: The sensor site code relevant to the event.
- Sensor: The specific sensor being monitored (if applicable).
- Type: The type of alert or data point (e.g., 'Static', 'Moving Average', or the sensor variable type).
- Value: The sensor reading or value that was evaluated (if applicable).
- Rain Pause: Indicates if a "rain pause" was active at the time of the event, which might suppress alerts (
True/False). - Email: The status of the email notification attempt (e.g.,
successorfailure). - SMS: The status of the SMS notification attempt (e.g.,
successorfailure). - Notes: Provides additional details, especially error messages if an alert failed to process or a notification failed to send (e.g., "Data load failure: ...", "Email send error: ..."). This column is very important for troubleshooting.
5.3 Filtering Events
Above the table, you'll find a filter form that allows you to narrow down the list of events:

- Status Dropdown: Allows you to view:
Allevents.Successevents (e.g., where at least one notification channel like Email or SMS reported success).Failureevents (e.g., where there was an error processing the alert, a data load issue, or a notification attempt failed).
- Start Date: Select a date to see events that occurred on or after this date.
- End Date: Select a date to see events that occurred on or before this date. The filter includes the entire end date.
After selecting your filter criteria, click the Apply Filters button to update the list.
Using these links will allow you to browse through all the historical alert events that match your current filter settings.
6. Troubleshooting
If you are not receiving alerts:
- Verify the sensor data is updating correctly at the source.
- Check your alert configurations for correct thresholds and sensor selection.
- Ensure email addresses and phone numbers are correctly entered.
- Check your spam/junk folder for email notifications.
- Review the "Alert Events" page (Section 5) for any error messages related to data fetching or notification sending.